Tag Archives: diy hanging pot

DIY hanging basket

1 Jul

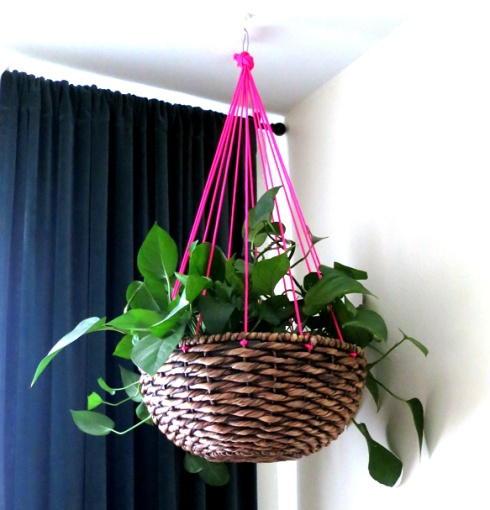
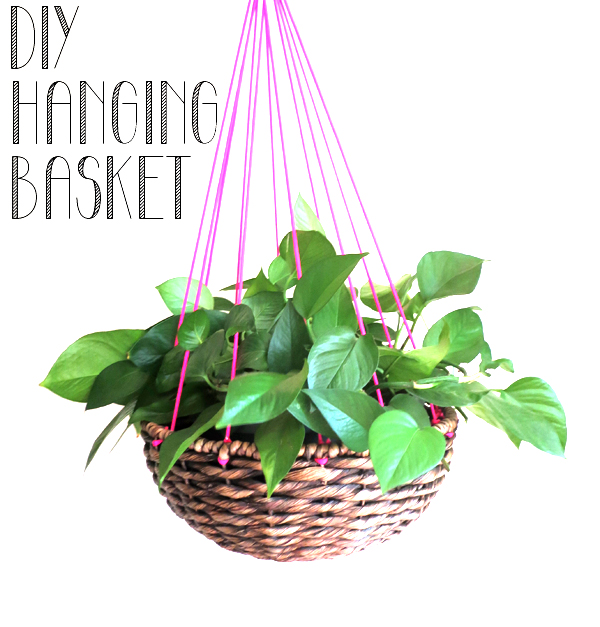
I was inspired by these planters I saw here. I love the impact of the long neon cord, but you can do it with whatever color you prefer. Parachute cord is available in a huge range of colors and in patterns. I went with hot pink. I like the contrast between the unnaturally bright cord and the natural fiber of the basket.

#DIY hanging basket by makingmondays

Supplies:

Basket

550 parachute cord (approx. $10 for 100 ft.)

Scissors

Lighter

Plyers

Metal ring (key ring or a loop of wire)

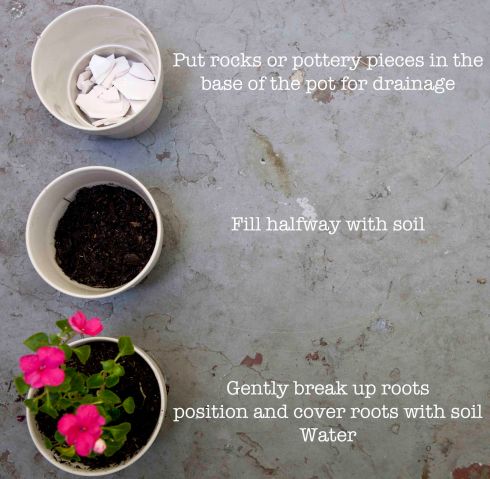
Houseplant (planted in a container without holes)

#DIY hanging basket by makingmondays

Choose a sturdy basket. Mine has a wire frame. If yours does not have a wire frame, you may want to put your knots around the rim.

Cut the cord in to 3 ft strips. I cut 12 strips, one for every other vertical rib in my basket. You can use less, but I recommend at least 4.

In a well ventilated space, use the lighter to singe the cut ends of the nylon cord to prevent unraveling. Do not touch the molten nylon, it will hurt.

#DIY hanging basket by makingmondays

Take one cord. From the inside push the cord through the weave at the joint between the rib and the rim. Push the end back though to the inside on the other side of the rib. Now both ends are on the inside and around the rib.

#DIY hanging basket by makingmondays

Tie a bowline knot. This is a simple fixed knot, I learned in one try. Repeat with each cord. I will be doing every other rib. But the important part is to attach the cords in a balanced way.

Gather all the cords and even the tension out. I tied a simple slip knot with the bundle of cord around a metal ring (I used a loop of wire but a metal ring would look better) to hang it from. Trim cord if necessary.

#DIY hanging basket by makingmondays

My project total was approximately $25. The cost of the hanging basket alone was $15, not including the cost of the houseplant. Your cost will vary depending on how much cord you decide to use and the cost of your basket.

#DIY hanging basket by makingmondays

DIY hanging fence pots

20 May

My house is small and my yard is even smaller. So I have to grow things wherever I can.

#DIY hanging fence pots

Supplies:

Galvanized steel wire

Pliers and wire cutters

Small pots (IKEA $0.49)*

Plants ( I used impatiences)

Potting soil

Rocks or pottery pieces

#DIY hanging fence pots

Cut wire into 12inch strips. One for each pot you intend to hang.

Using a pot as a guide, wrap a strip of wire around the middle to make a circle. Twist the two wires together on the back one or two times. The wire circle should be wrapped tight enough that the pot does not slide through it. Repeat with each strip of wire.**

#DIY hanging fence pots

Place the twist of two wires at an intersection on the fence (where the fencing makes an X). Wrap one wire around the upper left leg of the X and the other wire around the upper right leg of the X. Once secure, trim the ends of the wire.

#DIY hanging fence pots

Choose flowers based on your climate and space. I used impatiences because my fence is shady, only getting a few hours of filtered sunlight a day through the ivy.

#DIY Plant Step-by-Step

Slip the pots into the hanging circles and let gravity keep it in place.

#DIY hanging fence pots

My hanging pots cost $1.25 each. My total project cost was around $15. This included enough pots, wire, flowers and soil to make 12 . Making more won’t increase your total cost too much, about half of the wire and soil were left when all was said and done.

*Note: you want to keep the pots small and lightweight for this project so that they do not cause your fence to sag. Mine have been up for a year and I haven’t had any problems.